Getting started
LibCanComm is a Linux shared library for CAN communication. Its goal is to make it easier for application developers to access and exchange data with nodes on a CAN bus. The library supports both CAN classic and CAN FD message formats. LibCanComm embeds functionality for:
- Listing the available SocketCAN devices on the user's system.
- Connecting to a SocketCAN device.
- Transmitting and receiving CAN messages.
The library itself is developed in the C programming language. While designing the library's API, special care was taken to make it uncomplicated to create bindings for other programming languages. As such, it should be straightforward to access the LibCanComm shared library from different programming languages, such as Python, Java, C#, Rust, Go, Ruby, Object Pascal, etc.
Note that LibCanComm does not provide functionality related to configuring and bringing up SocketCAN devices on the user's system. The excellent LibSocketCan library already covers this, if you want to perform these tasks programmatically. Although most users tend to handle this manually themselves with calls to ip link or automate it with the help of systemd-networkd.
Installation instructions
This section presents step-by-step instruction for downloading, building and installing LibCanComm onto your Linux system.
Install build dependencies
To download, build and install LibCanComm onto your Linux system, you just need C development and Git related package on your system. The installation instructions for popular Linux distributions:
- Debian / Ubuntu / Raspberry PI OS:
sudo apt install git gcc g++ gdb make cmake - Fedora:
sudo dnf install git gcc g++ gdb make cmake - openSUSE:
sudo zypper install git gcc gcc-c++ gdb make cmake
Download the code
To obtain the code, you can either download the latest stable release from the GitHub repository:
Or directly clone the latest development version:
git clone https://github.com/pragmaticlinuxblog/cancomm.git ~/LibCanComm
It's recommended to stick with a stable release. The following sections assume that you either cloned or extracted the code to directory ~/LibCanComm.
Generate the build environment
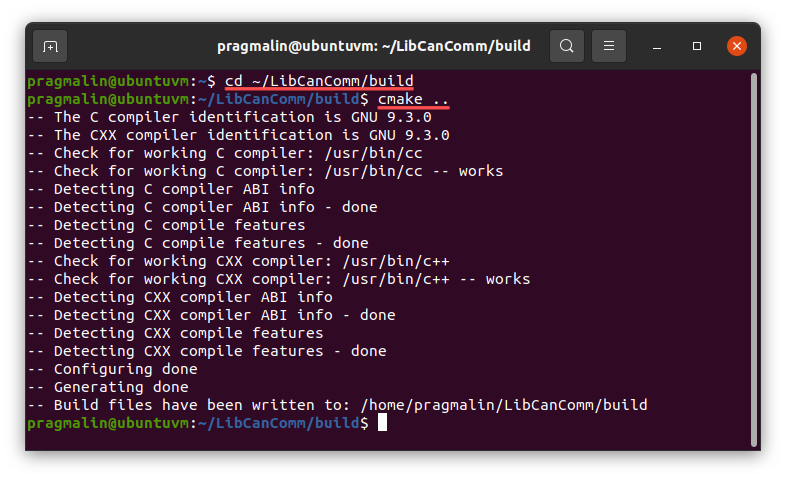
After downloading the code, you can automatically generate the build environment with the help of CMake. Open your terminal, go to the build subdirectory and run the cmake ..command:
cd ~/LibCanComm/buildcmake ..
Build the library
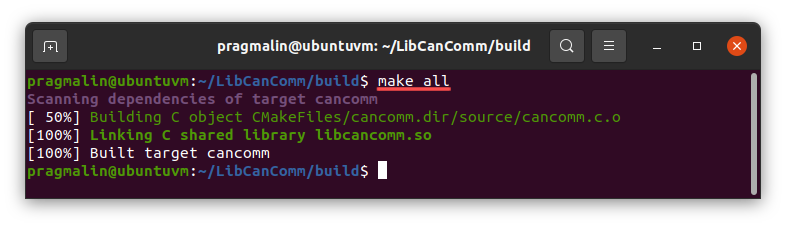
With the build environment generated, you can continue with building the shared library. Run this command:
make all
Install the library
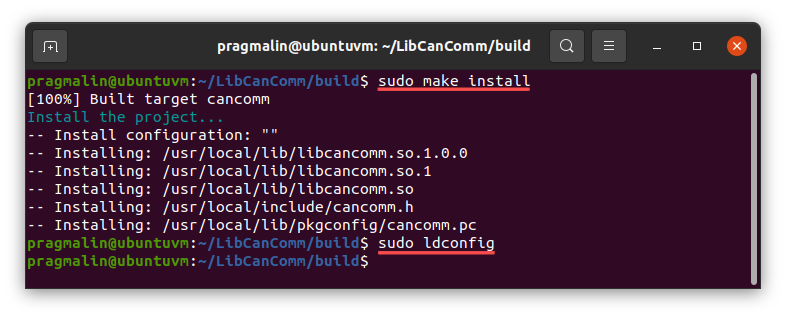
As a final step, you install the shared library onto your system and run ldconfig to register it:
sudo make installsudo ldconfig
Bring up a SocketCAN device
Before your application can communicate with other nodes on the CAN bus, you need to connect a CAN adapter supported by the Linux kernel's SocketCAN subsystem. For example a Peak PCAN-USB or a Kvaser LeafLight. Once connected, it shows up as a SocketCAN device on your PC. By default, the SocketCAN device is not yet configured and brought in the UP state. The following tutorials explain in details how to perform these tasks. Note that if you don't have access to a CAN adapter, you can continue with a virtual SocketCAN device.
- How to create a virtual CAN interface on Linux
- Automatically bring up a SocketCAN interface on boot
- CAN communication on the Raspberry PI with SocketCAN
Code sample
This section presents a few brief code samples to give you an idea of how you use LibCanComm in your own application. For more information refer to the example application and the API reference.
License
![]()